Running c-lightning in Simverse with plugins
4 minute readThe goal is to run c-lightning with plugins in a local testing cluster. For my cluster I use Simverse. Simverse allows for additional command line arguments to be passed to lightningd, so it should be possible to run lightningd with the plugin argument.
Let's first clone our plugin. We will be using one of the plugins that are available through Lightningd on Github.
cd ~\simverse\_repos
git clone https://github.com/lightningd/plugins.git --depth 1
We put the plugin in the _repos folder, because it is assumed that the plugin is there when the cluster is being build. (Also: throughout this article we assume your simverse folder is inside your home folder. If that is not the case, adjust it accordingly)
Since all nodes in Simverse run inside Docker containers, that plugin-file should be made available inside the Docker context folder. The _repos folder is not part of that context (each container gets its own context) so we have to copy the file from the _repos folder to the Docker context folder. Luckily Simverse works with the concept of recipes. A recipe describes how your cluster should look like. A recipe is a bash script that uses a library called cookbook that can be used to build your cluster step-by-step. Since it is "just" a bash script, you can do anything bash can do to tweak your cluster.
We will create a recipe that creates a cluster with three c-lightning nodes, running on a bitcoind back-end.
Simverse Recipe
#!/usr/bin/env bash

. cookbook/cookbook.sh

prelude

add bitcoind

LIGHTNINGD_EXTRA_PARAMS='--plugin=/home/simnet/.lightning/plugins/jitrebalance.py'

add lightningd alice
cp -r "$SIMVERSE_REPOS/plugins/jitrebalance" "$SIMVERSE_WORKSPACE/$SIMNET_NAME/_volumes/lightning-data-alice/plugins"

add lightningd bob
cp -r "$SIMVERSE_REPOS/plugins/jitrebalance" "$SIMVERSE_WORKSPACE/$SIMNET_NAME/_volumes/lightning-data-bob/plugins"

add lightningd charlie
cp -r "$SIMVERSE_REPOS/plugins/jitrebalance" "$SIMVERSE_WORKSPACE/$SIMNET_NAME/_volumes/lightning-data-charlie/plugins"


# generate init script to build connections
cat > init <<EOF
#!/usr/bin/env bash

set -e -o pipefail

# connect LN nodes
connect alice charlie
connect charlie bob
connect bob alice
EOF
chmod +x init
What is happening here? First we import the cookbook library. prelude does all the preliminary stuff needed for every cluster. After this we can start adding our back-end and our Lighning nodes. add bitcoind adds the bitoind node (duh!). Before we add our c-lightning nodes we set the LIGHTNINGD_EXTRA_PARAMS variable. This variable is passed to lightningd when starting up the Docker container. We use it to set the plugin argument.
We can now add our first lightning node, called "alice": add lightningd alice After this we can copy our plugin to the Docker context folder with the following command:
cp -r "$SIMVERSE_REPOS/plugins/jitrebalance" "$SIMVERSE_WORKSPACE/$SIMNET_NAME/_volumes/lightning-data-alice/plugins"We use several variables that may require some explanation. $SIMVERSE_REPOS holds the folder containing the Simverse repos. Since we have cloned our plugins repo into that folder, we can find it there. $SIMVERSE_WORKSPACE holds the folder where Simverse stores all the files required for creating a cluster. $SIMNET_NAME holds the name of the cluster. When we create a cluster based on this recipe, we also have to give that cluster a name. That name is available through the $SIMNET_NAME variable. The rest of theDocker context folder follows a simple naming convention: _volumes/[node type]-[node name]
We do the same thing for Bob and Charlie.
The last part of our recipe can be left out if you want. It generates an initialization script that can be run after creating the cluster. In this case it connects the nodes, but you can also use it to fund nodes and make transactions, build multiple scripts and what not. It just shows how versatile Simverse is.
We can save our recipe. There are some simple naming conventions that you can follow that make easy to see what kind of back-end(s) and nodes this cluster uses:
a: bitcoindb: btcdk: lightningdl: lndm: eclair
So a1k3 reads as "one bitcoind node and two c-lightning nodes". You should use a postfix to identify any additional distinguishing features of the recipe. So in this case we save our recipe as a1k3-plugin.sh in the recipe folder of Simverse located at ~/simverse/recipes.
Building your cluster
With our recipe out of the way we can create our cluster.
cd ~/simverse
./sv create a1k3-plugin jitrebalance
./sv enter jitrebalance
./dc build
./dc up
We have created a cluster named jitrebalance. This is the name of the cluster that we referenced in our recipe through the variable $SIMNET_NAME. Our cluster is based on the recipe a1k3-plugin.sh that we just created. With enter you enter your newly created simnet.
./dc is a handy shorthand for docker-compose with some important variables set. With build we build our Docker containers based on the docker-compose.yml that has been generated for us. And then we are ready to run the containers with up.
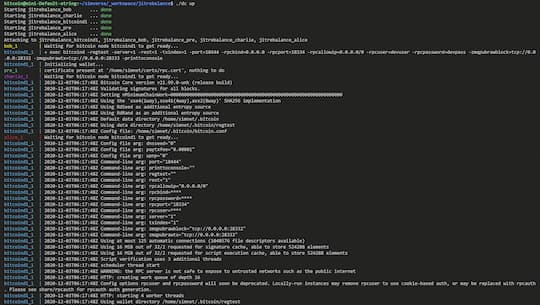
You should see something like this:

Now in a separate terminal session you can access your nodes and run the init script.
cd ~/simverse
./sv enter jitrebalance
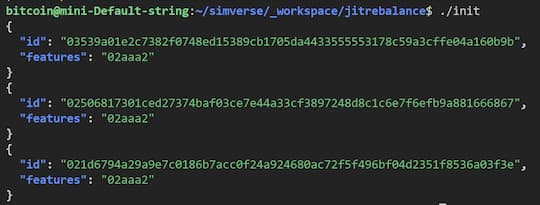
./init
And with that you are done! You have now a Simverse cluster with three c-lightning nodes running the same plugin.